
Last Updated on May 19, 2023 by River Tree Farms
The Hamilton Beach blender produces excellent juices, smoothies, baby formula, shakes, etc. It is one of the best appliances you should have in your home. If you have it already or are planning to get it, you will need to know to assemble and disassemble your Hamilton Beach blender. Knowing how to assemble and disassemble your blender is one big step to making your favorite juice.
You can quickly assemble the Hamilton blender by following the manual instructions keenly. The manual will help you carefully put apart the blender parts, and no bit is broken. After buying your blender, ensure to get the manual with you as it is easy to follow and clearly shows the steps to follow. However, if you lost your manual or didn’t have it, do not worry, as this article contains steps to assemble and disassemble your blender.
Process of assembling the Hamilton Beach blender parts
The method of assembling is straightforward and can be done by anyone, even with no experience. The steps to follow include the following;
Step 1: Unplug your Hamilton blender from the power socket and place it on a clean and dry surface.
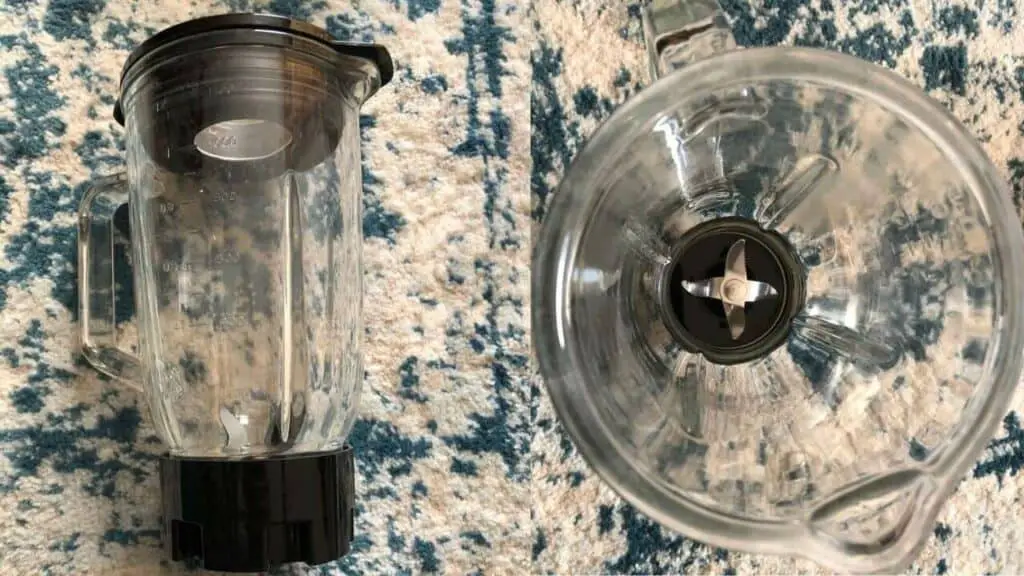
Step 2: With your gloves on, place the cutting blades on the base. Do not place the cutting edges without the jar being correctly attached.
Step 3: After carefully placing the blades to avoid harm since they are sharp, fit the gaskets over the edges. Ensure that the gasket lies flat.
Step 4: After setting the blender jar on top of the gasket, screw it firmly to avoid loosening later when the motor gets turned on.
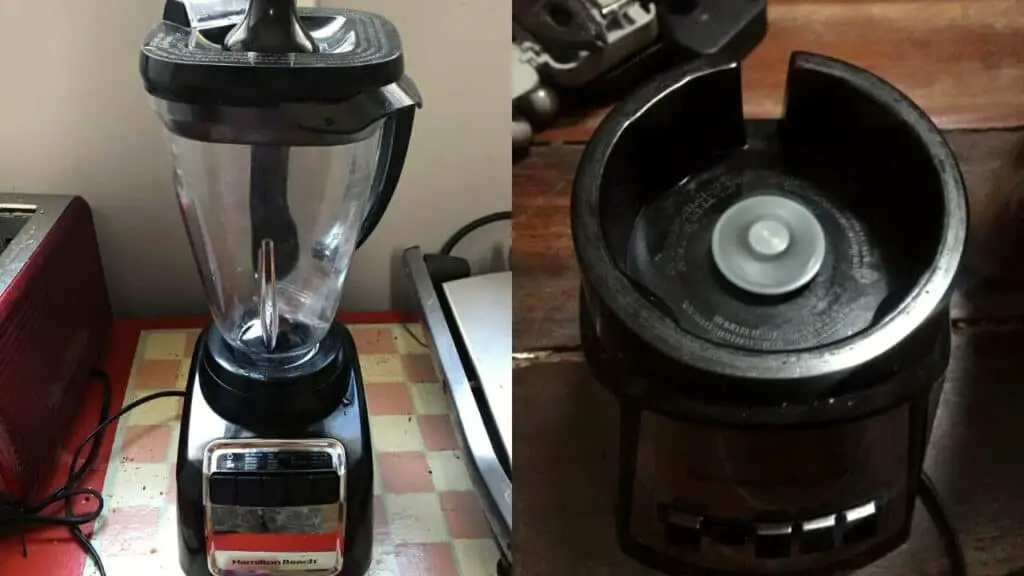
Step 5: Carefully place and lock the jar on the blender base. If the model doesn’t have the lock, firmly rock the pot until seated.
Step 6: Carefully plug the cord into the outlet.
Step 7: Put your ingredients in the jar and place the lid. Do not start the blender without the top set well. Turn on the power to begin blending, and your juice will be ready for drinking.
How to disassemble Hamilton Beach blenders
Disassembling a Hamilton Beach blender is as easy as assembling. When disassembling, ensure to follow the steps carefully to avoid any injury because the blades are very sharp. Manufacturers advise that you should use a manual to disassemble the blender.
The process of disassembling a Hamilton Beach blender
The steps to disassembly include;
Step 1: Disconnect the blender from any power source. You should not disassemble the blender while connected to a power source as it might cause electrical shock.
Step 2: Remove the filler cap from the lid and keep it in a safe and dry place.
Step 3: Remove the lid from the jar and keep it aside.
Step 4: If your jar was screwed to the safety base, unscrew it carefully to avoid destroying it.
Step 5: Carefully remove the gasket from the blades to avoid injuring yourself. Take apart the blades from the safety base and place them separately in a dry and clean place.
Step 6: After disassembling the parts, clean them one at a time carefully to avoid falls and breakages. Keep them dry before assembling them again.
Important Hints about using and caring for Hamilton Beach blenders
The following tips should be followed to ensure you use your blender for longer periods without replacement.
- Do not process or blend hot liquids in the blender, as it may cause hot drinks to sprout when the lid is removed. If you must mix hot liquids, remove the filler cap first.
- When the blender is operating and you want to add food, remove the filler cap and add your ingredients through the opening.
- Push the mixture down with a rubber spatula to the blades when the blender stops working. When doing this, ensure you turn your blender off.
- The blender makes smoothies and juices; hence you should not mash potatoes or prepare the dough in the blender as it will block and the blades can bend.
- When done blending your liquids, remove them from the jar.
- Always wash your Hamilton blender after every use to ensure that the liquids do not stick. You should follow the manufacturer’s instructions when cleaning.
- When assembling or disassembling your blender, ensure it is not connected to a power source.
- Always keep your manual safe and follow all the instructions correctly.
- Do not replace the blender parts without proper advice and inspection from an expert. Ensure you get originals from the Hamiltons website to avoid counterfeit parts that can break anytime.
- Please do not put the electric parts in the water as it might cause electrocution.
- Use your blender in a clean and safe environment. The place should as well be dry.
Safety Information
- If you want to crush ice in the blender, cover the ice with a liquid and crush your ice in small patches at the highest speed possible.
- Do not use the blender for any other purpose rather than the intended.
- If you notice any electrical power problems, do not use the blender unless adequately inspected.
- Do not use the blender if the cutting blade assembly is locked and cannot move; it will damage the motor.
- Do not put the blender jar in a freezer if it has liquids, as this can cause injury to the user or damage the cutting blade assembly, the pot, or the blender in general.
- Proper care should be taken when washing the blender jar. The blades are very sharp and can injure the user. It would be best to keep the blender out of children’s reach as they can harm themselves with the cutting blades.
- Do not immerse the base or food chopper in hot water.
- If you notice any damaged cord in the blender, do not use it.
- You should not process hard foods like meat or potatoes as they will bend the blades.
Final verdict
After following all instructions provided, you are sure that you can assemble and disassemble your Hamilton Beach blender perfectly. Proper cleaning and maintenance are required to reduce replacement costs and increase lifespan.
Manufacturers’ instructions and safety tips must be followed to the core. If you do not yet know how to assemble or disassemble, please do not hesitate to reach us today.