Last Updated on May 19, 2023 by River Tree Farms
Moen has an excellent reputation. Its kitchen faucets are innovative, durable, and easy to use. They work a lot like most faucets in the industry. Depending on the specific faucet model you have, assembly and disassembly processes are pretty easy. You don’t need any special knowledge or tools. Many Moen faucets have interchangeable fixtures. Therefore, you can upgrade them without having to deal with lots of bolts or supply lines. If you are curious about how to disassemble a Moen kitchen faucet, keep reading to learn.
Disassembling a Moen Kitchen Faucet
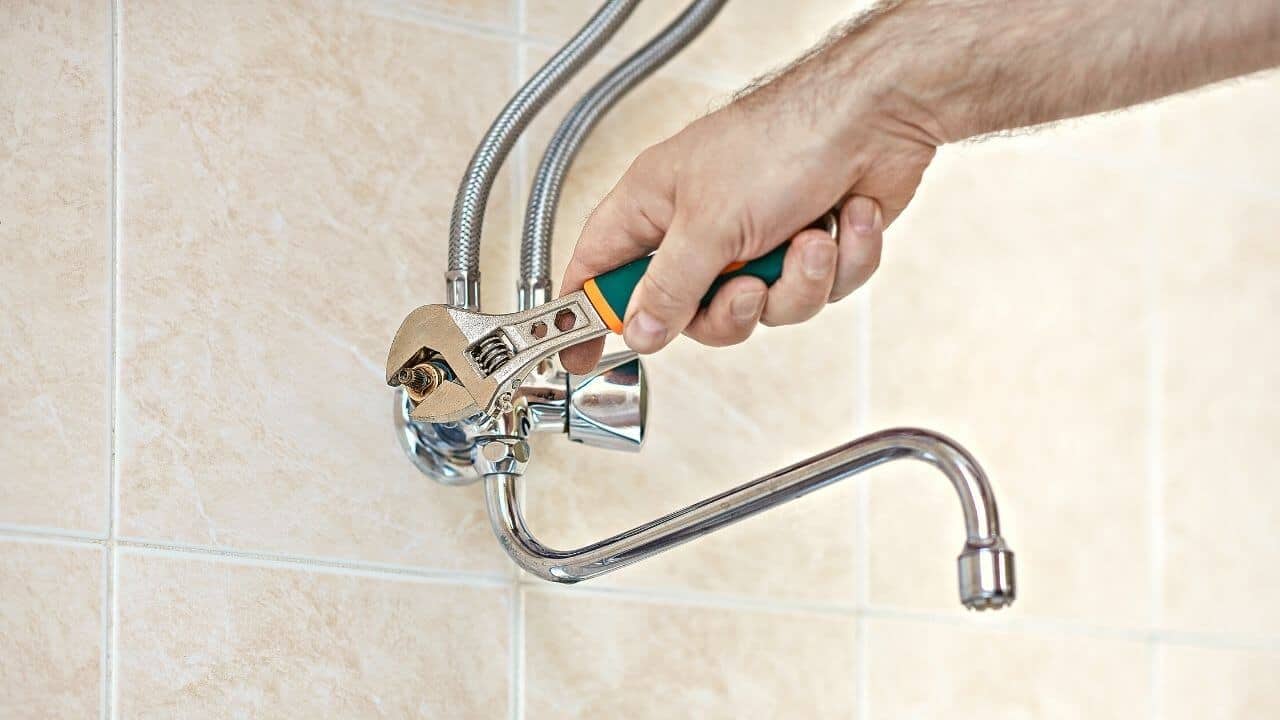
Taking apart the Moen kitchen faucet requires three main tools: a wrench, a screwdriver, and a stem with pliers. You don’t need a professional plumber since it is a pretty simple process. Follow these steps to complete the process:
1. Turn the Water Supply Off
Find the water supply under your kitchen sink and turn it off. If you have separate hot and cold water supplies, ensure that they are both turned off.
2. Drain the Pipes
Open your kitchen faucet and drain all water from the pipes. Do not start the disassembly process before you are sure that the pipes around your faucet are completely empty.
3. Remove the Faucet Handle
If you have M-PACT faucets, you can loosen them by hand. Grasp the top part of your faucet in your hand and use the other hand to hold the base. Turn the base anticlockwise as you apply some clockwise pressure to the faucet handle. When the base has loosened up, it should lift straight up and get off the cartridge.
If you have trouble loosening the base, consider using a rubber grip to improve traction. Use the kind of rubber grip that you would use when opening a stuck jar. A thick towel and adjustable wrench will also work just fine. If you choose to use a wrench, don’t let the teeth come in contact with the metal as it could leave ugly marks.
Moen kitchen spouts with M-PACT design have little Allen screws to secure them at the back. If a decorative cap has been used to cover the screw, use a small flat screwdriver. Slide it along one side of the cap and then lift it. This should be enough to remove the cap. Use an Allen key to turn anticlockwise until the spout lifts.
4. Remove the Plastic Sleeve and Dome
Once the faucet handle is out of the way, you should see a dome. It easily slides out, and you can see a black jacket. Using a wrench, turn anticlockwise to remove the jacket.
5. Remove the Handle Mechanism
In the previous step, you removed the black jacket. In this step, you will be removing what lies behind it. The handle mechanism regulates the flow and water pressure from your faucet. The mechanism is held intact with a screw which you can use a screwdriver to remove. The mechanism easily falls apart.
6. Removing Ring and Washer
There should be a white ring below the handle mechanism. Take note of the direction it is facing as you will need to remember it when reassembling the faucet body. Use your wrench to remove the washer.
Disassembling Other Moen Faucets
If your Moen faucet doesn’t have the M-PACT design, you need an Allen or Philips screw to disassemble it. The screws are typically found below decorative tabs on the handles and spout. You can easily lift the top part of the spout or handle to expose one or two components that you need to twist off.
You may run into a handle adapter secured in position by a Philips screw. Use a screwdriver to remove it and take out the plastic retainer nut and washer with a wrench. Use a Moen cartridge puller to lift the cartridge up. This should be enough to take out the entire cartridge.
Reassembling Moen M-PACT Faucet
After your kitchen faucet repair, it is time to put your kitchen faucets back together. After disassembling the trim, inspect the inside base of the handles and the cartridges. If there is debris or a buildup of minerals, clean it appropriately.
Follow the steps of disassembly in reverse, ensuring that the cold and hot taps are in the appropriate cartridges. Your handle should be positioned appropriately in the ‘off’ position, and the base has to be tight.
How to Repair a Faucet
One of the most common causes of leaky kitchen faucets is a poor cartridge O-ring. This is one of the most important things to focus on when conducting your repairs. If the cartridge O-ring is faulty, replace it. The ring is at the base of your faucet cartridge, and it wears over time. If not fixed, it can let water escape through the faucet base.
If your faucet around the base is leaky, the cartridge O-ring is the main culprit. If your Moen has two handles, check both of them for issues. Moen kitchen faucets typically come with a lifetime warranty to cover the cost of cartridge replacement. When unsure of where the parts are located, consider checking out a Moen kitchen faucet parts diagram.
Should you notice scaling on your cartridge, you can use a vinegar solution to remove it. There is no need for replacement. Soak your cartridge in vinegar solution for a few hours and wipe it clean before putting it back.
Read Also: The 6 Best Kitchen Faucets For Portable Dishwashers
Conclusion
If there is a cartridge faucet in your kitchen, it is probably a Moen faucet. The brand is popular for its integrity and efficiency. It is one of the biggest names in regard to cartridge faucets. The assembly and disassembly of Moen kitchen faucets are a lot like other faucets.
Even though it might initially seem difficult, learning how to disassemble a Moen kitchen faucet can be a piece of cake. Once you figure it out, you can assemble and disassemble your kitchen faucet without professional help. You get to enjoy a leak-free, clean faucet and save money at the same time. In addition, the experience can be satisfying.